In previous posts, I highlighted where I screwed up with my first CNC machine. There were more than a few mistakes made for sure! While the Millright M3 was a working tool, it wasn’t fit for what I wanted and I figured this out after purchasing and building it. It was too small, didn’t have enough cutting height, and the belt drive just wasn’t meant to move the router fast enough through the materials I wanted to cut.
Bulletproofing the Build
After all the mistakes I made with the M3, and everything I’ve learned the hard way, I finally know what I need in a CNC machine. I want a larger workable area, including more Z height. It has to be lead screw or ball screw driven. And it needs to be rigid enough to chew through wood and at least some aluminum without flinching.
To handle that, NEMA 17 motors just aren’t going to cut it anymore. Sure, they’d move the machine, but at speeds so slow I might as well go back to hand tools.
I’m not a mechanical engineer, and I’m not pretending to be one. So instead of trying to sketch something from scratch and hoping for the best, I went hunting for battle-tested designs that have already proven themselves in the wild. OpenBuilds.com turned out to be a goldmine. The site is packed with community-built designs, mod guides, and real-world experience from people who’ve been where I’m standing now.
They also offer complete kits for several of their machines; ready to build, tweak, or tear apart. A few of those builds caught my eye right away. Solid frames. Smart design. Not overly complex. Just what I need to get rolling without reinventing the wheel.
The Machine That Checked All My Boxes
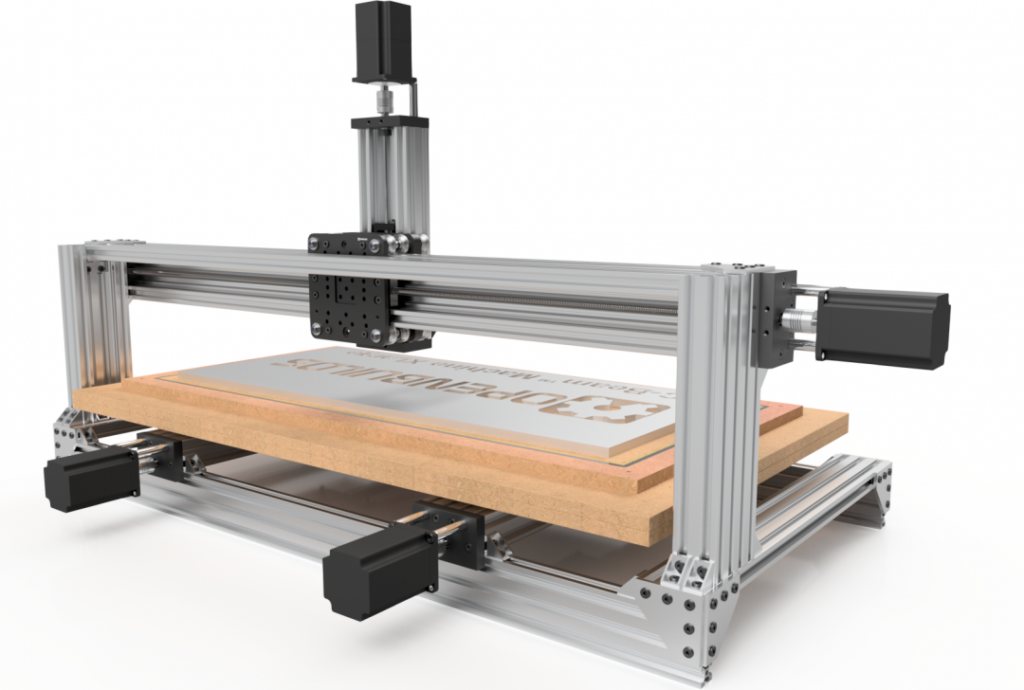
After spending hours online researching different machines, the two finalists were the QueenBee Pro 1000mm x 750mm (39.4″ x 29.5″) from Bulkman3D and the OpenBuilds C-Beam. The QueenBee Pro has a workable area of 590mm x 755mm (23.2″ x 29.7″) while the C-Beam has a 350mm x 280mm (13.8″ x 11″) workable area. Right off the bat, I could see that the stock C-Beam is not much better in size than the MillRight M3 that I already own. And the QueenBee Pro, with its movable gantry, gave me serious concern with the z-axis stability for deeper capacity, especially with aluminum.
I kept coming back to the C-Beam and looking. I could see that, because of its aluminum extrusion construction, it could be made larger by swapping out a few parts here and there. The scales started tilting in favor of the C-Beam the more I thought about this. Then one afternoon while I was searching for reviews on the C-Beam, I came across a link titled “C-Beam XLarge.”
Holy extrusion, Batman! It’s the C-Beam on steroids! The link was to the OpenBuilds.com forum where someone had the complete parts list and build instruction videos!
The C-Beam XLarge has a workable area of 750mm x 330mm (29.5″ x 13″) for the X and Y axis. While the Z axis has around a 2-inch (50.8mm) working height, I can get a little more by switching out the extrusion with one a little longer so that was a non-issue to me. Looks like I found my machine!
Attacking The Beast
As a baseline, the standard C-Beam comes in a kit from OpenBuilds for around $1200 US at the time of this writing for the anodized black frame (plus $30 shipping). Not too bad I guess.
Mechanical: The Heart Of The Build
After watching the build video several times, I decided to grab the parts list from OpenBuilds and start pricing out what this thing would cost and where to source my mechanical parts. TL;DR – mechanical parts are just under $1000 before shipping.
Electronics: Brains and Motion
I’ll be honest, electronics scare the crap out of me. For that reason, I will rely heavily on the internet to figure out the what and why. But from where I stand now, the basic setup to make this machine do the job, I will be using four NEMA 23 269 oz.in stepper motors, DM542 stepper motor drivers, 48V 16A 800W power supply for the drivers, a 24V power supply of other sorts to power any fans, lights and the Arduino UNO R3 which will be the main CNC motion controller.
Spindle: The Business End
This one is pretty simple. I will be using the Dewalt DWP611 palm router that came with the M3. There’s nothing wrong with it and it keeps the overall costs down.
Odds and Ends
There are a few extra things I’ll need to bring this whole setup together. Most of which I have yet to discover! First of all, limit switches are a must for homing and avoiding crashes, so I’ll be adding those on all axes from the get-go. To make sure the wiring is as stable as possible, I’ll be using 4-wire aviation connections from the motors to the control box. This will allow for easy disassembly and replacement if required later. I’ll also need some drag chains to keep everything tidy and safe from snags. Cooling isn’t critical, but I’ll likely toss in a fan or two for the electronics control box, especially around the stepper drivers. Cable management is always a headache, so I’m planning ahead with some clips, zip ties, and whatever else I can find. Lastly, I’m throwing in a big ol’ red emergency stop button because, well … it just feels wrong to build a CNC without one.
We Build From Here
So that’s the plan. A bigger, beefier, more capable machine, built from the bones of a proven design, tailored to fix every complaint that I had with the last one. The parts list is mostly locked in, the research is done, and I’ve got a solid vision for how it’s all going to come together. But I won’t be surprised if something has to change because I overlooked or forgot something along the line.
Up next? Making it real. I’ll start gathering the components, organizing the build process, and diving into the inevitable challenges that come with putting something like this together. If the MillRight M3 was CNC 101, this build is the next chapter. This time, I’m coming in with eyes wide open for a (hopefully) smoother ride.
Stay tuned for the next post where I actually start the build and dig into the real fun (and probably a few surprises).